
Performance and Installation Planning for a 9 cm Zinc Alloy Villa Door
October 20, 2026
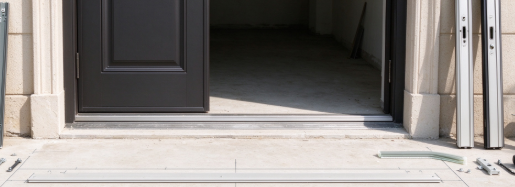
A 9 cm Zinc Alloy Villa Door performs as intended only when the selected doorset, wall opening, anchorage, seals, and hardware work together. The nominal 90 mm dimension is only one item in that system. A strong procurement process joins the product drawing to the site survey and states how air, water, security, operation, and finish are to be checked. That approach is more useful than choosing a door by appearance and trying to solve fit problems after delivery.
Survey the Opening Before Ordering
Record the opening after the structural opening is ready, but before final trim conceals the edges. Measure width at the top, middle, and bottom; height at both sides and the center; and both diagonals. Note floor buildup, threshold level, wall thickness, cladding, and the direction in which the door must swing. These six linear measurements plus the diagonals provide a quick picture of taper and squareness. They are a practical survey method, not a substitute for the supplier’s installation tolerances.
Keep the measurement reference consistent. A structural opening, finished opening, frame outside dimension, and clear passage are different quantities. Ask the supplier to show all four on the approved drawing. A 90 mm leaf can fit a wall that needs a deeper frame or a trim extension; it can also create a reveal that affects the appearance and weather seal. Do not reduce the rough opening based on an online image or a product title.
Site check | Measurement or record | Why it affects the order |
Opening width | Top, middle, bottom | Identifies taper and determines usable frame width |
Opening height | Left, center, right | Checks floor and lintel level differences |
Diagonals | Both corner-to-corner measurements | Shows whether the opening is square |
Wall depth | Finished depth at several points | Determines frame coverage and trim needs |
Threshold | Finished floor height and drainage direction | Affects clearance, accessibility, and water management |
Handing | Viewed from the nominated side; hinge side and swing | Prevents wrong-hand hardware or obstructed circulation |
Services and structure | Nearby switches, steps, columns, and fixing substrate | Avoids conflicts and supports secure anchorage |
Set Performance Requirements Before Choosing Options
Choose requirements from the building location and applicable code. For burglary resistance, EN 1627:2021 uses resistance classes RC1 through RC6, with an RC1N variant in its classification system. The selected level should reflect the project risk assessment and local authority requirements. The test report must correspond to the full doorset configuration. A change in leaf size, frame, lock, glazing, hinge, or anchorage can take the delivered product outside the tested construction.
For air leakage, EN 12207 classifies completely assembled windows and pedestrian doorsets based on EN 1026 testing. The class is a result of a defined test, not a general product adjective. Ask for the class, test specimen description, and size range. Also review water tightness and wind-load requirements where the door is exposed to weather; the exact test standard depends on the target market and whether the product is covered by the relevant doorset standard. The installer still needs to seal the frame-to-wall joint correctly.
Performance topic | Recognized reference | Information to request |
Burglar resistance | EN 1627:2021 | RC class and report for the matching full doorset |
Air permeability | EN 12207 with EN 1026 testing | Class, specimen dimensions, seals, threshold, and hardware |
Corrosion exposure | ISO 9227 test method where specified | Test duration, coating system, evaluation criteria, and specimen details |
Thermal performance | Applicable national method or declared-value procedure | Whole-doorset value, calculation or test basis, and options covered |
Acoustic performance | Project or market-specific acoustic test method | Laboratory value for the complete doorset assembly |
Coordinate the Frame, Anchors, and Wall
The frame is the load path from hinges and locking points into the building structure. Confirm the fixing substrate—concrete, masonry, timber, or steel—and the supplier’s fixing locations and fastener requirements. The installer should not rely on trim or sealant to hold the frame in place. If the wall is hollow, weak, or irregular, the designer may need a reinforcement or approved fixing detail. Keep the frame plumb, level, and square while fixing, then verify the door leaf gap and latch engagement.
The perimeter joint has two jobs: accommodate movement and limit air and water entry. Use sealants and backing materials appropriate to the substrate and exposure. The outer weather seal should shed water, while the inner seal and insulation fill help control air movement and heat loss. Do not block intended drainage routes in the sill or frame. A water path that is sealed shut can trap moisture instead of preventing it.
Commission the Door as a Working Assembly
At handover, operate the door through repeated open-close cycles and check that it does not bind, rub the threshold, or require unusual force. Test all locking points with the door both open and closed, check handle return, inspect gasket contact, and look for light gaps around the perimeter. For paired leaves, verify the meeting stile and flush bolts. Confirm that the closer, if fitted, controls the door without slamming and that any access-control device releases correctly.
A commissioning record can be short but useful: door ID, final opening dimensions, frame fixings, sealant type, hardware model, test report reference, date, installer, and outstanding items. Include photographs of the fixing locations before trim is installed if the project quality plan calls for them. Give the owner cleaning and maintenance instructions, especially for finish care, hinges, seals, and lock lubrication.
Use Corrosion and Finish Claims Carefully
Zinc alloy can be part of an attractive exterior finish, but the result depends on the entire coating system and exposure. ISO 9227 describes salt-spray testing; it does not create one universal pass duration for every exterior door. Ask which parts were tested, how the samples were prepared, what coating was used, and what failure criteria applied. If the project is coastal or subject to de-icing salts, request evidence suited to that environment and confirm maintenance intervals with the manufacturer.
Questions Buyers Often Ask
Can the same test report cover every door size?
Only if the report or certification explicitly includes the size and configuration range. Ask the supplier or testing body to confirm the permitted scope.
What should be checked before the installer leaves?
Confirm smooth operation, latch and lock engagement, perimeter gasket contact, frame alignment, and finish condition. Record any adjustment or repair.
Is a salt-spray test enough to prove outdoor durability?
No. It is one laboratory test method. Exposure, coating system, specimen preparation, acceptance criteria, and actual maintenance all matter.
Conclusion
For a 9 cm Zinc Alloy Villa Door, good installation starts with a correctly measured opening and a product drawing that defines the 90 mm dimension. Performance claims should be backed by reports for the complete doorset, and the frame, anchors, seals, and hardware should be approved as one coordinated assembly. Since Kepon Doors’ product page could not be independently retrieved, confirm its actual configuration, ratings, and installation details with the company before using them as product facts.